Report an incident
When a problem arises, you'll want to create an incident. Incidents can be created automatically from integrations, but can also be created and assigned manually. This guide focuses on manual incident creation.
All users in a Ready Five account can create and assign incidents. No explicit permissions are required.
Incidents can be created from the web or mobile app.
Create a new incident
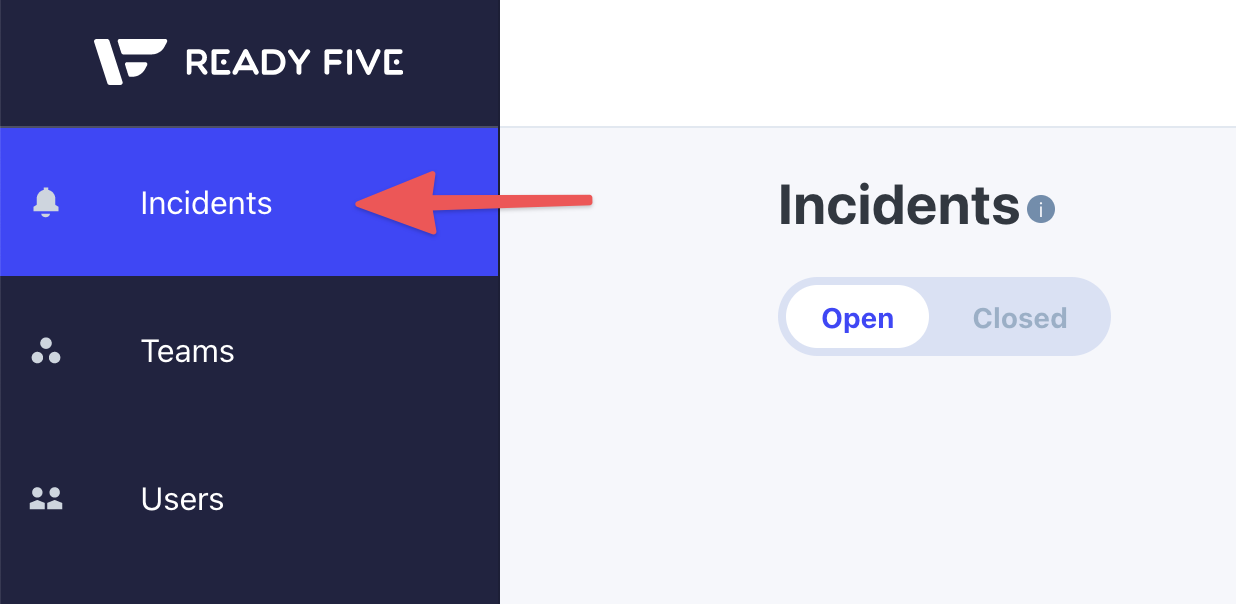
Sign in to your Ready Five account and choose the Incidents tab.
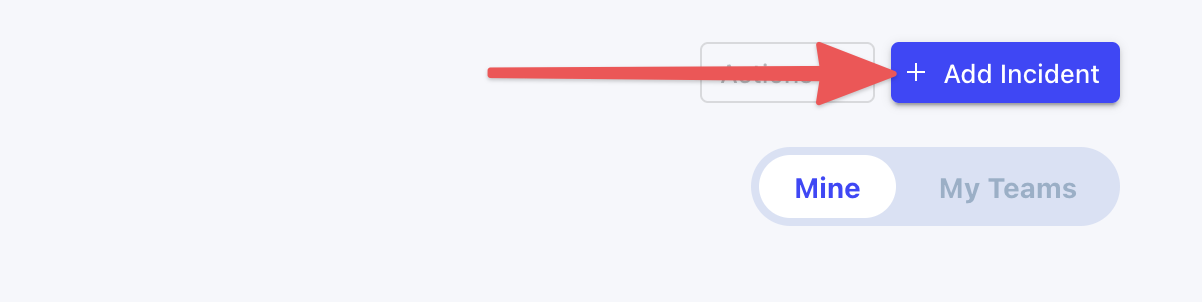
Click the "Add Incident" button at the top right of the screen. In the mobile app, tap the "+" circle at the bottom right of your screen.
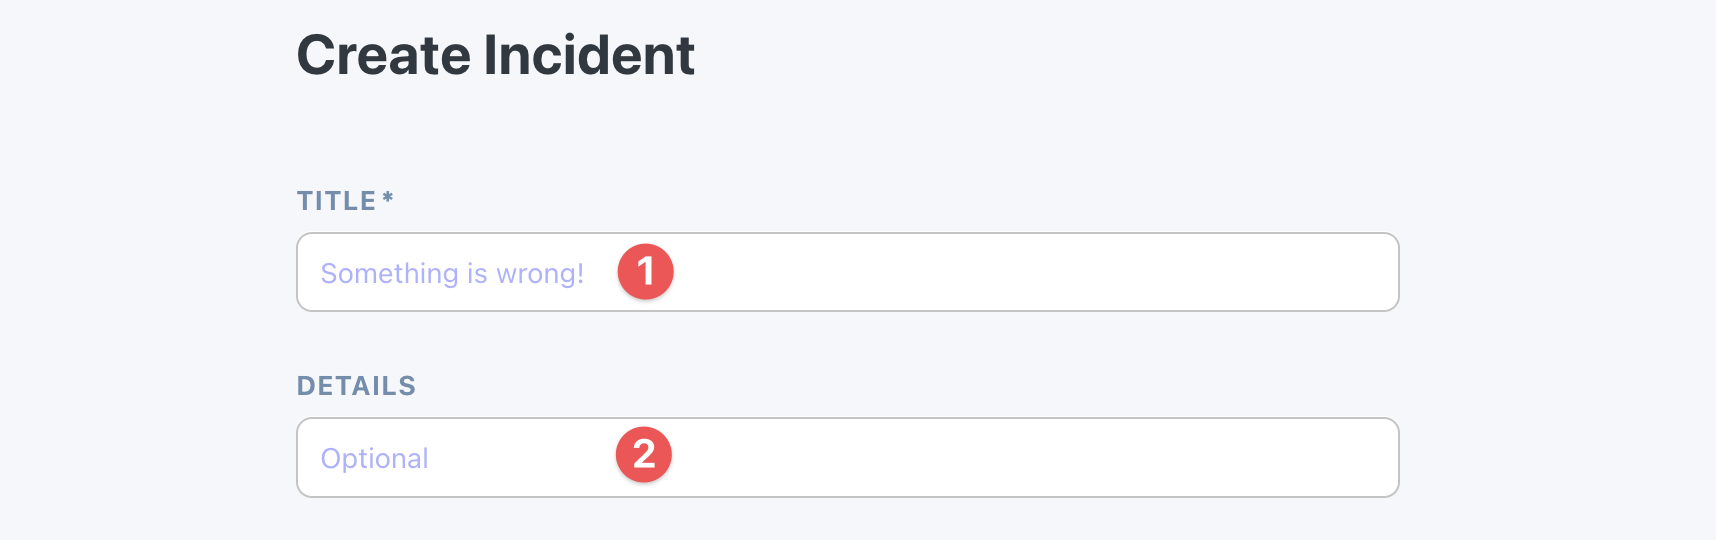
Enter a "Title" for this incident. Describe the issue and where the assignees are needed but be concise, as this title is included in the inital message sent to anyone assigned.
The "Details" field is optional, but can be used for additional and more verbose details about the issue.
Now, choose who should be notified about this incident. Typically the best way to get a hold of the right person is to target a team's default escalation policy. This way you don't need to know who is on call, on duty, or who is out or on vacation.
You can choose any number of policies to target for a single incident and the escalation policy steps will be invoked for each policy, notifying the right person or people.
Choosing multiple policies is effectively saying "I need someone from any of these teams to respond". Once anyone acknowledges, snoozes, or resolves the incident, further notifications to assignees will be suspended.
If you know you need someone from each of the assigned teams, make a separate incident for each escalation policy that you're targeting so the escalation process continues until someone responds.
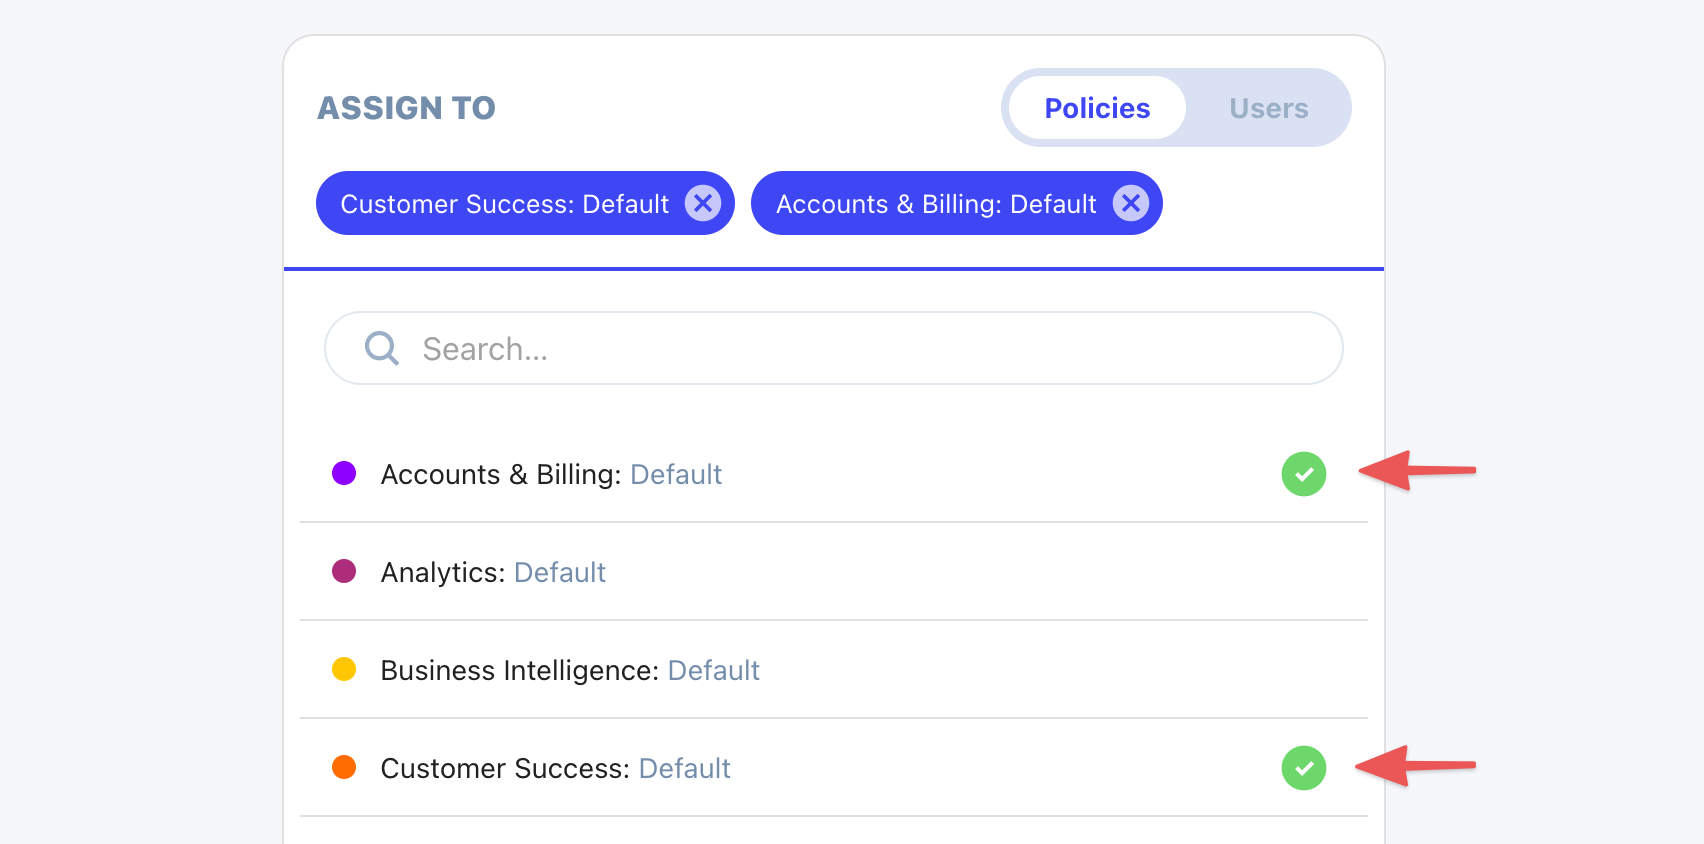
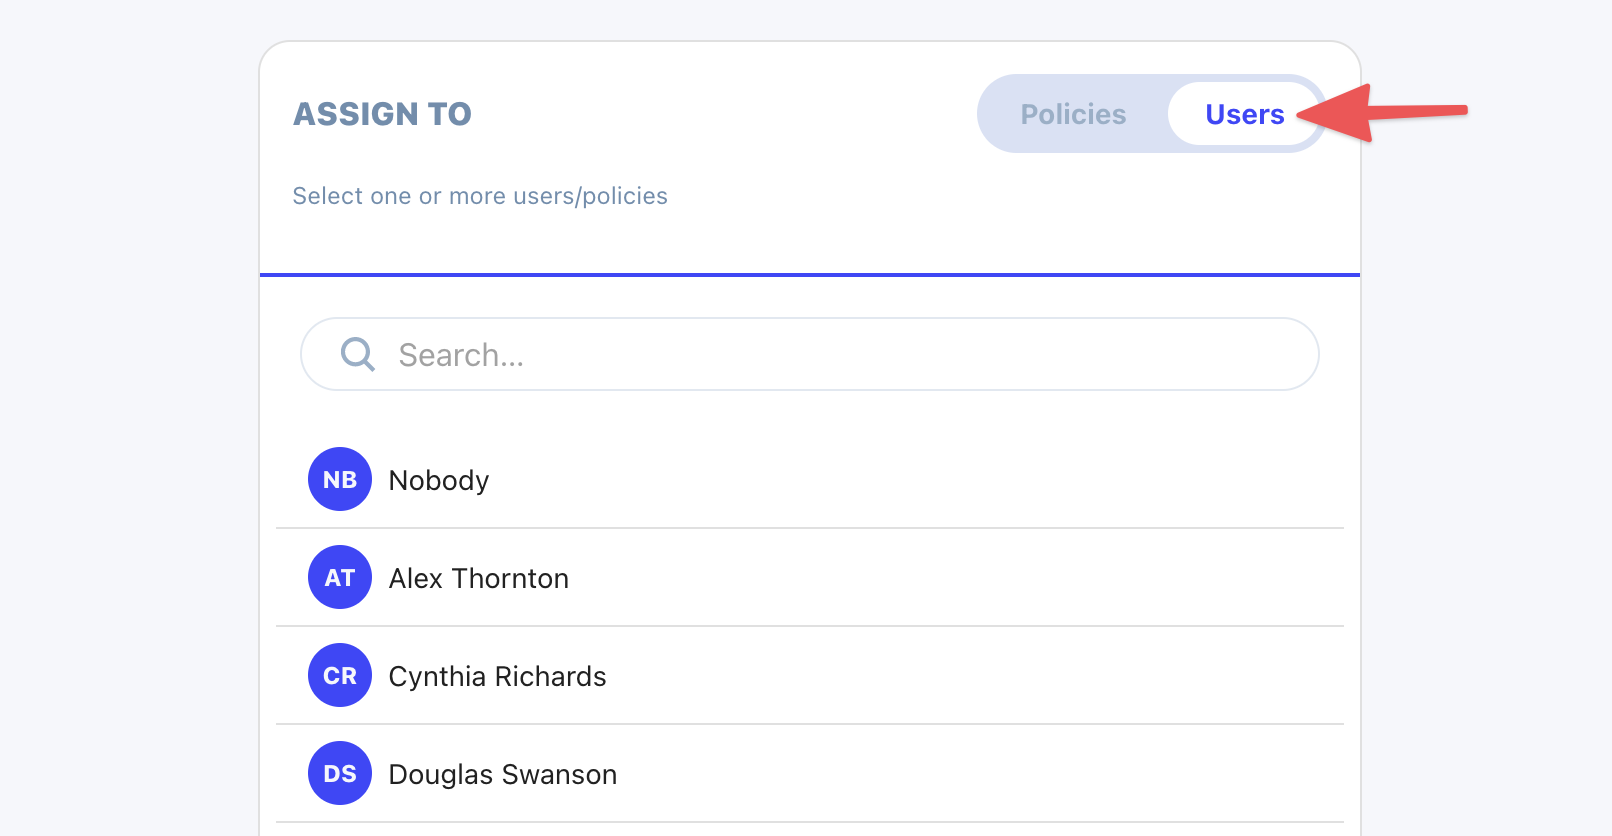
You can also assign individual users directly. This circumvents escalation policies and will notify users regardless of their on call or on duty status.
Click the "Create" button to save the incident and trigger appropriate notifications.
